Prerequisites
In order to follow this tutorial you have to install
npm package manager and node js
Cloudinary Setup
To get started simply create a free account on cloudinary ( https://cloudinary.com/users/register/free)
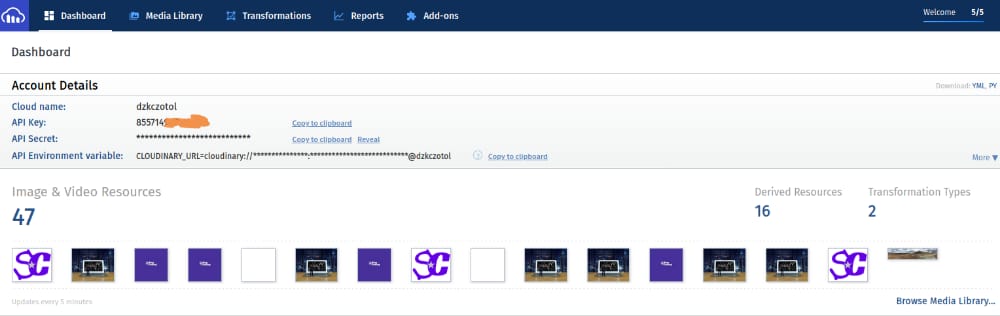
once logged in you will be provide three most important things that we will use further in our turorial.
these things are:
-cloud name
-Api key
-Api secret
Go to dashboard and you will see the above three things
Strapi Setup
If you don't have a strapi project just follow the step below to create a new strapi project
yarn create strapi-app my-project --quickstart
if you don't have yarn install just make npm install -g yarn
run
strapi dev to start your server
Create an Administrator user
Navigate to http://localhost:1337/admin
(opens new window).
Complete the form to create the first Administrator user
You can to strapi documentation to check how to manage and create content type in admin dashboard
Working with Images in Strapi
In your strapi project run
yarn add strapi-provider-upload-cloudinary
to add cloudinary to your project
In your config folder create a file plugins.js and the following code:
module.exports = ({ env }) => ({
 /
/ ...
 upload: {
   provider: 'cloudinary',
   providerOptions: {
     cloud_name: env('CLOUDINARY_NAME'),
     api_key: env('CLOUDINARY_KEY'),
     api_secret: env('CLOUDINARY_SECRET'),
   },
 },
 // ...
});
Now create a .env file like shown below
CLOUDINARY_NAME = pasteYourCloudinaryCloudName
CLOUDINARY_KEY = pasteYourCloudinaryApiKey
CLOUDINARY_SECRET = pasteYourCloudinaryApiSecret
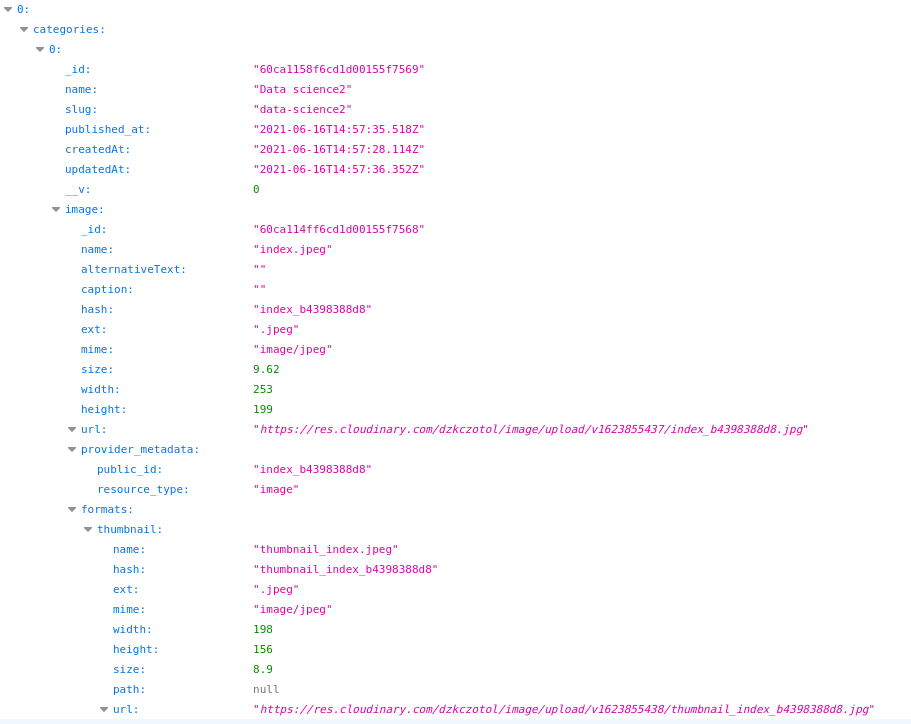
Now we have the image url starting with "https://res.cloudinary.com/………”
Thank you